Sunday, December 30, 2012

Sweet Love Child

At the start of the new year, many of you will vow to cut out sweets from your life, go on diets and jump on the treadmill, desperately trying to drop a few holiday pounds. I get very lonely when that happens :-) Since I have a couple more days before 2013 gets here, I thought I'd share one last recipe in 2012 that's full of buttery, sugary goodness. Can I tempt any of you with Oatmeal Raisin Cookie Coffee Cake? There are oats and raisins in it, so don't feel so guilty. 

My very own photo/blog assistant!

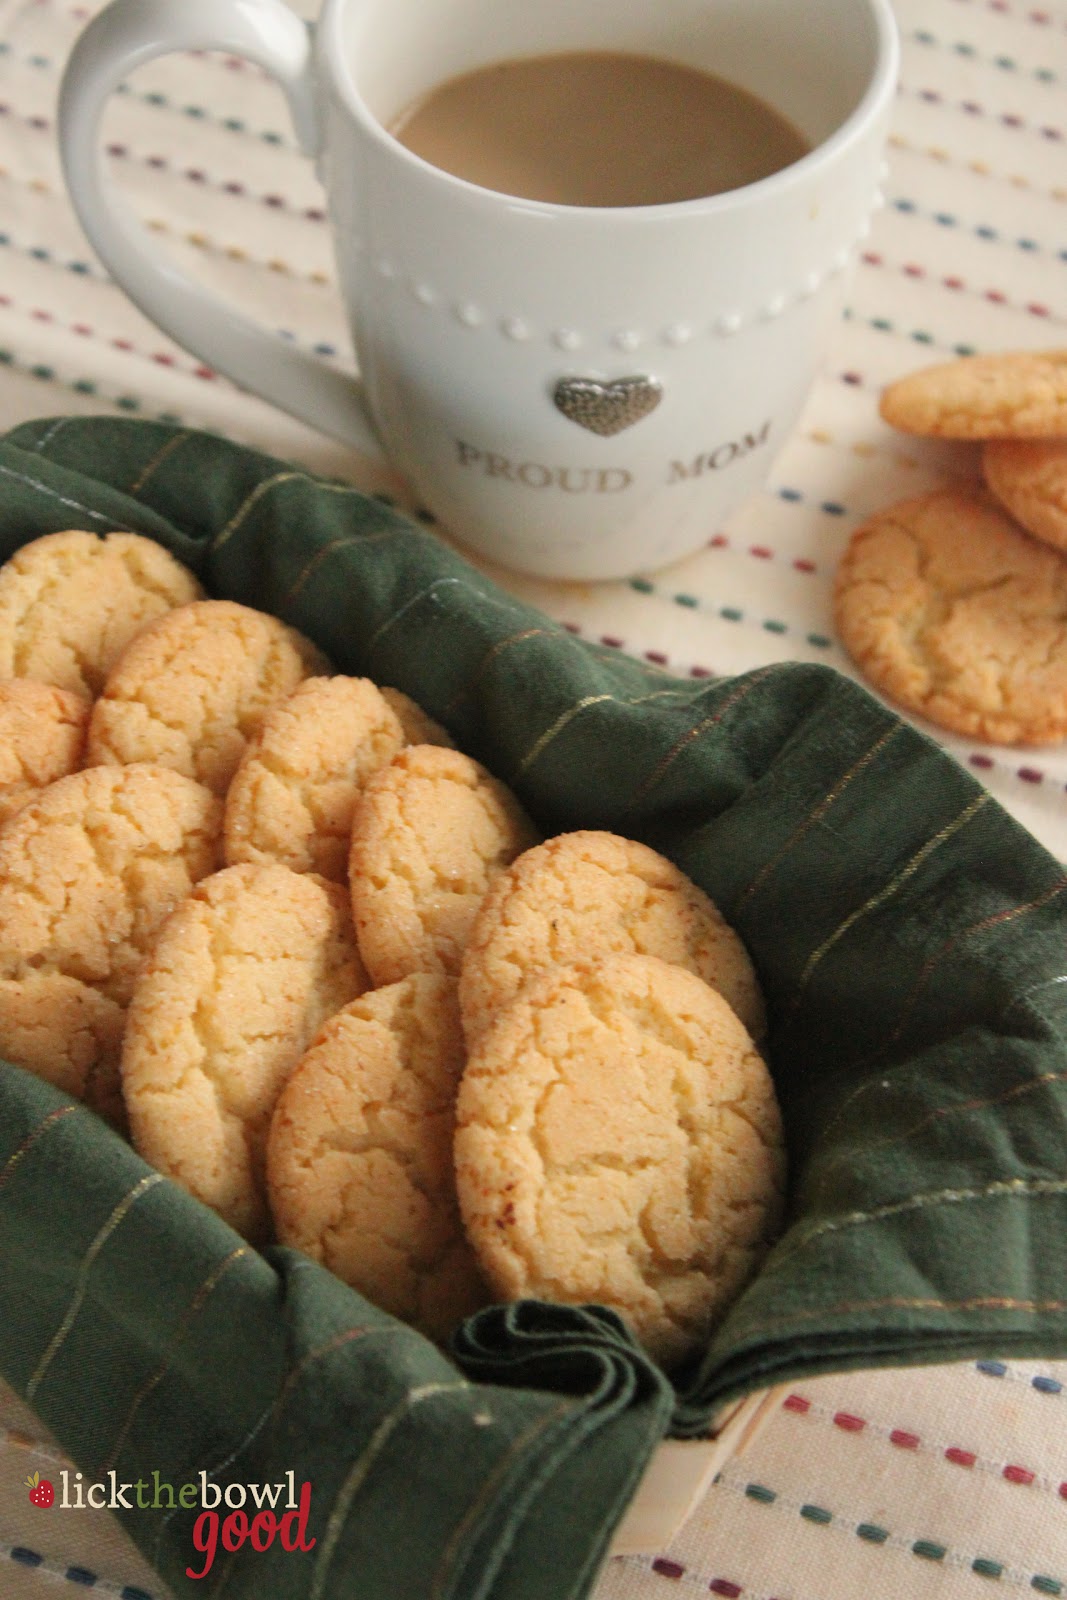
I saw this recipe and had to make it, because I love me a good oatmeal raisin cookie. It's such a simple cookie, but it delivers every time- chewy raisins and oats, crunchy and buttery edges...oh, so good! There are oats in the cake batter, in the filling and the top cookie crumble. It's got raisins scattered throughout with spicy cinnamon and nutmeg perfuming the whole thing. It's practically health food. If coffee cake and cookies got together and had a love child, this would be it. And what a sweet love child it would be. While there is no coffee in this cake, a warm cuppa is the perfect accompaniment. 


Oatmeal Raisin Cookie Coffee Cake adapted from Baking Bites

Printer Friendly Version

For The Cake:
  • 2 cups all purpose flour
  • 2/3 cup quick cooking oats
  • 2 teaspoons baking powder
  • 1/2 teaspoon salt
  • 1 1/4 cups brown sugar
  • 1/2 cup unsalted butter, room temperature
  • 2 large eggs
  • 1 cup buttermilk
  • 1 teaspoon vanilla extract
For The Cookie Crumble:
  • 1/4 cup flour
  • 1 cup brown sugar
  • 1 1/2 teaspoon ground cinnamon
  • 4 Tablespoons unsalted butter, cut into pieces
  • 2/3 cup raisins
  • 1/3 cup quick cooking oats

Preheat the oven to 350 degrees F. Butter a 9-inch springform pan.

To make the cookie crumble: In a medium mixing bowl, combine flour, brown sugar and cinnamon. Using your fingertips, rub the butter into the flour mixture until well combined and the mixture is coarse and sandy. Stir in raisins and oats until mixed throughout. Set aside while you make the cake batter.

To make the cake: In a medium mixing bowl, whisk together flour, oats, baking powder and salt; set aside.

In a large mixing bowl, cream together butter and brown sugar until light and fluffy. Beat in eggs one at a time.

Blend in half of the flour mixture until just combined. Add all of the buttermilk and the vanilla and stir until  well mixed, then blend in the remaining flour mixture and mix until just combined, but do not overbeat.

To Assemble: Pour half of the batter into prepared pan. Top with half of the cookie crumble. Pour remaining batter on top and spread carefully to the sides of the pan. Sprinkle the remaining crumble evenly over the batter.

Bake for 45-50 minutes, or until a toothpick inserted into the center comes out clean. Allow cake to cool on a wire rack for 10 minutes, before running a knife around the edge and carefully removing the springform ring. Allow to cool completely before serving. 

Store cake in an airtight container.

Thank you for the support and encouragement you all have shown me here at Lick The Bowl Good. I couldn't do this without each and every one of you. I hope to bring you many new and delicious creations in the upcoming year. Please be safe as you ring in 2013. Cheers!

~Monica H

Saturday, December 22, 2012

Last Minute Treats and Handmade Gifts


I am so cookied out! I keep thinking of other cookie recipes I want to make, but in reality, I really don't want to stand on my feet in the kitchen for hours on end, reaching into the hot oven. After baking 22 dozen cookies, I'm looking for an easy way out. And these cookie sandwiches are the golden ticket. 


I found these on my friend, Michelle's blog, One Ordinary Day and they could not be simpler. The hardest part was unwrapping all the shiny gold foil off the chocolate covered caramels, the rest was just easy peasy. You line up your crackers, top them with Rolos, bake for 3-5 minutes, then top with another Ritz and you're done. From start to finish, these took me about 10 minutes, so if you're in need of a quick sweet treat, these are for you. 


Rolo Stuffed Ritz Crackers adapted from One Ordinary Day

Printer Friendly Version 
  • Rolo Candies
  • Ritz Crackers

Preheat oven to 350 degrees F. 

Place Ritz crackers on a cookie sheet face side down, and top each one with a Rolo candy.

Bake for 3-5 minutes to soften (but not fully melt) the Rolos, Remove from the oven and immediately top  the Rolos with a second Ritz cracker. Cool completely before storing in an airtight container. 

NOTE: There are about 55 Rolos candies per bag. 


If you need a last minute gift for the grandparents, these salt dough ornaments are perfect. You only need three ingredients to make the dough, and acrylic paint and ribbon to embellish them. You can make them as fancy or as simple as you want, it's the handprint and the memory of spending time with your child that's important. 

Salt Dough Handprint Ornaments adapted from Once A Month Mom 

  • 1 cup flour
  • 1/4 cup salt
  • 7 tbsp water
  • Round cookie cutter large enough to go around the handprint
  • 1 drinking straw
  • Craft paint
  • Ribbon
Preheat oven to 250°F. 

Mix together flour, salt, and water. Knead for 10 minutes til smooth and no longer sticky. Add a little flour at a time, if necessary.  

Roll out the dough to no more than 1/4-inch thick, then use the cookie cutter (or glass) to make rounds. Press a hand into dough. If you’re doing this with really little ones, you may have to go back and make deeper impressions of their hands with your fingers or a kitchen utensil–the deeper the impression, the better your ornaments will turn out. 

Use a straw to poke a hole in each ornament (this is where the ribbon will go later). Place on a baking sheet and bake for 1 1/2 to 2 hours or until ornaments have completely dried out. 

Remove the tray from the oven, once they're cool enough to handle, place ornaments on a cooling rack and allow to cool before painting. Paint or decorate as you want. When the decorations have dried, thread ribbon through the hole. Hang on your tree. 

Hot Cocoa Cupcakes


Hi Everyone, 

I mentioned last week that my Hot Cocoa Cupcakes were going to be featured on People.com. The link for Kid Friendly Holiday Cupcakes went live on Tuesday and out of the 14  festive cupcakes featured, mine were front and center. I am beyond thrilled! Thank you for stopping by and sharing in my joy. And thank you Brooke for asking me to be a part of this segment- I'm honored to be included with so many other talented bakers. 

~Monica h

Wednesday, December 19, 2012

Festive Muffins for Eating and Sharing


I promised you all another eggnog recipe, and here it is! Only this one uses real eggnog and is enhanced with rum extract and nutmeg to heighten the eggnog flavor throughout the muffins. And nothing says its the holidays more than eggnog and cranberries nestled together in a spicy crumb topped  muffin. There's freshly ground nutmeg in the muffin, as well as cinnamon and more nutmeg in the topping. They're warm and spicy, then you get a tart little bite of the bright cranberry. They're moist and tender, then crumbly and crunchy. Delicious and perfect when eaten with an eggnog spiced hot coffee. 

I've made these a couple of times now, tweaking along the way until I was happy with them and now I'm sharing with you...and the neighbors. I made a fresh batch yesterday morning to take to the neighbors on either side of us. They usually bring over my favorite pecan butter balls and tins of still-warm-from-the-oven gingerbread. I love eating homemade baked goods, that I didn't have to labor over, don't you? So whether you choose to make these for yourself on Christmas morning or as gifts, keep in mind that this recipe only makes 9 muffins, which might be a good thing, if you can't seem to put down the cookies and need portion control (like me). 

Cranberry Eggnog Crumb Muffins from Monica h

Printer Friendly Version

For the crumb topping:
  • 1/4 cup all-purpose flour
  • 1/4 cup sugar
  • 1/4 teaspoon. ground cinnamon
  • 1/4 teaspoon ground nutmeg
  • 2 Tablespoon unsalted butter, softened
For the muffins:
  • 2/3 cup granulated sugar
  • 6 Tablespoons (3/4 stick) unsalted butter, melted
  • 1 large egg
  • 1/3 cup eggnog
  • 1/2 teaspoon vanilla extract
  • 1/2 teaspoon rum extract
  • 1 1/8 cups all-purpose flour
  • 1 1/2 teaspoons baking powder
  • 1/4 teaspoon salt
  • 1/4 teaspoon ground nutmeg
  • 3/4 cup coarsely chopped fresh cranberries

Preheat the oven to 400 degrees F.  Line 9 muffin cups with paper liners.  

To make the crumb topping: In a small mixing bowl, combine the flour, sugar, cinnamon and nutmeg; stir to combine. Using a pastry blender or your fingers, cut the butter into the dry ingredients until a coarse, sandy mixture forms. Refrigerate the mixture, while you make the muffin batter. 

To make the muffins: In a large mixing bowl, combine sugar, melted butter, egg, eggnog, vanilla and rum extract. Stir until well combined.  

Add flour, baking powder, salt and nutmeg to the wet ingredients and stir just until incorporated.  The batter may appear thick and dry, once you add the cranberries, it will loosen up a bit. Fold the chopped cranberries into the batter, but do not overmix. 
Divide the batter evenly between the prepared muffin liners, filling them about two thirds of the way full.

Sprinkle the crumb mixture evenly on top of the muffin batter.
  
Bake for about 18-20 minutes, or a until a toothpick inserted in the center comes out clean.  Let cool in the pan for 5 minutes, before transferring to a wire rack to cool completely.  

Makes 9 muffins. 


I have one more festive recipe for you, so I'll be back in a couple days. Happy Wednesday! 

Monday, December 17, 2012

The Great Cookie Thief


I spent the weekend stocking my freezer with Aunt Mary's Sugar Cookies and these Eggnog Snickerdoodles. In the process, I discovered my son is a great climber and a cookie thief!  Since I was working at the kitchen island, I set the wire rack on the breakfast table full of cooling cookies. Before I knew it, that monkey of mine had climbed up onto the chair and was on the table taking bites out of cookies. I think over the course of an hour, he had stolen half a dozen cookies, bit onto them and fed them to our dog, Autumn. What a stinker!

The Great Cookie Thief!

My friend Maranda, shared this recipe with me a few weeks ago for Eggnog Snickerdoodles. This is very much like regular snickerdoodles (a cinnamon-sugar coated sugar cookie) but it uses nutmeg instead of cinnamon, and rum instead of vanilla. Um, yes please! I used my small cookie scoop to portion out the dough and baked them for 10 minutes (per the directions) but I think they over baked slightly, because while all my cookies were nice and blond in color they all wound up crunchy and not at all chewy, like a typical snickerdoodle. Nonetheless, they were tasty, and my family prefers crisp cookies anyway. If you wan them chewy, bake for 8-9 minutes or use a larger cookie scoop and just adjust the baking time accordingly. 

I have another eggnog flavored recipe coming soon. Have a good week, everyone!


Eggnog Snickerdoodles
  • 1/2 cup unsalted butter, softened
  • 1/2 sup shortening
  • 2 cups sugar, divided
  • 2 eggs
  • 1/2 teaspoon rum extract
  • 1/2 teaspoon white rum, optional
  • 2 3/4 cups all-purpose flour
  • 2 teaspoons cream of tartar
  • 1 teaspoon baking soda
  • 1/4 teaspoon salt
  • 3 1/4 teaspoons ground nutmeg, divided
Preheat oven to 400 degrees F. 

In a shallow bowl, combine 1/2 cup sugar and 3 teaspoons of nutmeg. Stir to combine and set aside. 

In a medium bowl, combine the flour, cream of tartar, baking soda, 1/4 teaspoon ground nutmeg and salt. Set aside. 

In a large bowl, cream the butter, shortening, and 1 1/2 cups sugar until light and fluffy, 

Beat in the eggs, the extract and the rum, if using. Gradually add the flour mixture and mix well. 
Roll dough into 1-inch balls. (I used a small cookie scoop to portion out the dough). Roll dough balls into sugar mixture, coating well. 
Place on ungreased cookie sheets, placing them 2-inches apart. 

Bake for 8-10 minutes or until lightly browned. Remove to wire racks to cool. 

Makes 5 dozen 2-inch cookies. 

He may be a cookie thief, but he also likes to share with his uncle Aaron.  He's such a sweet boy. 

Thursday, December 13, 2012

Hot Cocoa Cupcakes for People.com!


I still haven't made any Christmas cookies, but I made these adorable cupcakes for People.com. As in People Magazine!!! Outside I'm calm and collected, inside I'm jumping up and down with glee! How exciting is that? I was asked to contribute a kid friendly holiday cupcake photo and I didn't have anything on my blog that was quite right, so I came up with these hot cocoa cupcakes that were not only cute but tasty and full of holiday flavors. 

I started off with my favorite chocolate cupcake recipe and substituted prepared hot cocoa in place of the water and added a handful of chocolate chips for extra richness and flavor. Then instead of frosting, I used an array of cocoa toppings that included fresh whipped cream, mini marshmallows, mini chocolate chips and crushed peppermints. Since these cupcakes are essentially mugs of hot cocoa, I finished them off with edible mini candy cane handles. I loved how these turned out! If you like chocolate and mint, these are sure to be a hit with your little elves. 

Hot Cocoa Cupcakes from Monica h


For The Cupcakes:
  • 1 1/2 cups all-purpose flour
  • 1 1/4 cups sugar
  • 1/4 cup unsweetened cocoa powder
  • 1 teaspoon baking soda
  • 1/2 teaspoon baking powder
  • 1/2 teaspoon salt
  • 1/3 cup canola oil
  • 1 cup prepared hot cocoa, cooled
  • 1 teaspoon vanilla extract
  • 2 eggs, lightly beaten
  • 1/2 cup mini chocolate chips
For The Whipped Cream
  • 1 1/4 cups heavy cream
  • 1/3 cup powdered sugar
  • 1/2 teaspoon vanilla extract
Garnishes:
  • mini marshmallows
  • mini chocolate chips
  • crushed peppermints
  • 18 mini candy canes

For The Cupcakes: Preheat oven to 350 degrees.  Line cupcake tins with 18 paper liners and set aside.

In a large bowl, combine flour, sugar, cocoa powder, baking soda, baking powder, and salt. Using a wire whisk, blend the dry ingredients thoroughly.

Add the oil, prepared hot cocoa, vanilla and eggs to the dry ingredients. Whisk until well incorporated and no lumps remain. Stir in the chocolate chips. 

Evenly divide the batter between the lined cupcakes tins.

Bake the cupcakes for 18 to 20 minutes, or until a toothpick inserted into the center comes out clean. Allow to cool for 10 minutes; then place them on a rack to cool completely.

For The Whipped Cream: In a medium bowl, combine heavy cream, powdered sugar and vanilla extract. With an electric mixer on medium speed, beat until thick, creamy, and slightly stiff, being careful not to overbeat. 

To Assemble The Cupcakes: Pipe or mound the sweetened whipped cream onto the cooled cupcakes. Garnish with a sprinkling of mini marshmallows, mini chocolate chips and crushed peppermints. Add a mini candy cane tucked into the side of the cupcake, to make a handle for the "mug" of hot cocoa. 
Serve immediately. Cover and refrigerate any leftovers. 

Makes 18 cupcakes. 

Monday, December 3, 2012

Latte Cheesecake and Wacky Weather


Happy December! I always wondered what Christmastime in a tropical climate was like. Wondered if people decorated their palm trees with C-9 bulbs and tinsel garland while wearing flip flops and tank tops, stopping to take a break to beat the heat with an icy beverage. Then I realized that 2012 would be the year that I got to experience that, only I'm still in Texas! This weather is so strange. It was 80 degrees today and does not feel the least bit like winter. I had lunch with a friend today (hi L!) and went to pick up Hayden at my mom's house, only to find him wearing nothing but a diaper helping Grandma stick candy canes in the ground. It was a sweet image, but nekkid babies playing outside in December??? It's unreal!

Needless to say, I have yet to start  my holiday baking. There has not been a single cookie to grace my Silpat lined sheets but I will get there. In the meantime, I hope you'll enjoy this recipe for Brownie Latte Cheesecake.  I made it last month as part of the Cake Slice Bakers and it was delicious.  Cheesecake is holiday-ish, right? It probably won't be a part of any cookie trays this year but sometimes you need a nice centerpiece dessert and this is it. 


Instead of a typical cookie crumb crust, this cheesecake has a thick, dense, fudgy, chocolate rich base. In contrast, the filling is ultra creamy and light in texture. The flavors of chocolate, espresso, vanilla, and Kahlua compliment each other so well. This is definitely one for sharing and a little sliver goes a long way but that's what makes it ideal for holiday gatherings and celebrations, that and it can be made a couple days in advance. I'll get my act together, paint the windows with a can of fake snow and flip the switch on my fireplace to get me in the butter baking mood. If y'all have any great holiday cookie recipes for me, please share!

Brownie Latte Cheesecake adapted from The Cake Book


For The Brownie Layer: 
  • 4 oz. semisweet chocolate, coarsely chopped
  • 1/2 cup (1 stick) unsalted butter, cut into tablespoons
  • 1 Tablespoon instant espresso powder
  • 1 teaspoon vanilla extract
  • 1/4 teaspoon salt
  • 1 cup granulated sugar
  • 2 large eggs
  • 1/2 cup all-purpose flour
For The Latte Filling: 
  • 1 1/2 pounds (24 oz.) cream cheese, softened
  • 1 1/2 cups granulated sugar
  • 1 Tablespoon vanilla extract
  • 2 teaspoons espresso powder, dissolved in 1 Tablespoon hot water
  • 2 Tablespoons Kahlua
  • 1/8 teaspoon salt
  • 1/2 cup sour cream 
  • 1 Tablespoon cornstarch
  • 4 large eggs
To make The Brownie Layer: Position a rack in the center of the oven and preheat the oven to 325 degrees F. Lightly grease the bottom and sides of a 9x3-inch springform pan. Cut an 18-inch square of heavy duty aluminum foil and wrap around the outside of the pan. 

In the top of a double boiler, melt the chocolate with the butter over barely simmering water, stirring occasionally. Transfer the mixture to a medium bowl and stir in the espresso powder, vanilla extract and salt. Whisk in the sugar until combined. Whisk in the eggs one at a time, until blended. Stir in the flour until no traces remain. 

Scrape the batter into the prepared pan and smooth it into an even layer. Bake the brownie for 25-30 minutes, until a toothpick inserted into the center comes out with a few moist crumbs attached to it. Place the pan on a wire rack and let cool while you make the filling. Leave the oven on. 

To Make The Latte Filling: In the bowl of an electric mixer, using the paddle attachment, beat the cream cheese at medium-low speed until creamy and smooth, about 2 minutes. Gradually add the sugar and beat until blended. Add the vanilla extract, espresso mixture, Kahlua, salt, sour cream and cornstarch and mix until well blended. At low speed, add the eggs one at a time, mixing well after each addition and scraping down the sides of the bowl with a rubber spatula as needed. 

Scrape the batter onto the brownie layer and smooth the top. Place the springform pan in a roasting pan or a large baking pan. Pour enough hot water into the roasting pan to come about 1 inch up the sides of the springform pan. Bake the cake in the water bath for 70-80 minutes, until the center is set but slightly wobbly (the cheesecake will continue to set up as it cools). Turn the heat off and crack the door, allowing the cake to cool in the oven for about 30 minutes. Remove the cake from the water bath and place on a rack and cool to room temperature. 

Refrigerate the cheesecake for at least 4 hours or overnight before serving. 


Sleeping Beauty

Wednesday, November 21, 2012

Thankful


              ...For my watcher of pies. 

Tuesday, November 20, 2012

Happy Thanksgiving!


Thanksgiving is a couple days away. What are you making?! My aunt graciously opened up her house to us this year, so the family will be heading to her house for some good eats. We usually do things potluck style so that everyone can bring their favorites and so that not one person is doing all the work. I am making a couple casseroles and a dessert of some sort. I haven't figured that one out yet, though I'm sure it will be pie- I'm thinking pecan. Thanksgiving isn't complete without pie!

I was craving something pumpkin-y the other day to go along with my pumpkin spice latte so I whipped up a batch of these pumpkin white chocolate chip squares. The recipe called for semi-sweet chips, but my mom was making faces at that addition so I used white chocolate instead- She's very opinionated, that lady. The buttery, creamy white morsels were really good in these bars and with each bite you got a little pocket of sweetness against the dense, spicy cake. If you need a quick no fuss dessert for Thursday, this might be the one for you. The recipe can be doubled and baked in a 9x13-inch pan to feed a crowd, if necessary. 

Pumpkin Chip Squares adapted from Martha Stewart 

  • 1 cup all-purpose flour
  • 2 teaspoons pumpkin-pie spice
  • 1/2 teaspoon baking soda
  • 1/2 teaspoon salt
  • 1/2 cup (1 sticks) unsalted butter, room temperature
  • 2/3 cup brown sugar 
  • 1 large egg
  • 1 teaspoon vanilla extract
  • 1/2 cup canned pumpkin puree
  • 1 1/4 cups white chocolate chips (dark, milk or cinnamon chips may be substituted)

Preheat oven to 350 degrees. 

Generously spray a 9-inch square baking pan with nonstick spray. 

In a medium bowl, whisk together flour, pumpkin-pie spice, baking soda, and salt; set aside.

With an electric mixer, cream butter and sugar on medium-high speed until smooth. Add egg and vanilla and beat until combined. Add pumpkin puree, then mix until incorporated, (mixture may appear curdled and that's okay). Reduce speed to low, and mix in dry ingredients until just combined. 

Using a spatula, fold in 1 cup of the chocolate chips by hand, reserving the other 1/4 cup for the top of the bars. 

Spread batter evenly in prepared pan. 
Bake  for 30-35 minutes or until edges begin to pull away from sides of pan and a toothpick inserted in center comes out with just a few moist crumbs attached. Immediately after removing the pan from the oven, sprinkle the remaining 1/4 cup of white chocolate chips over the top of the pumpkin bars, gently pressing them into the top, being careful not to burn yourself. 

Allow to cool completely in pan before cutting into squares and serving. 

Happy Thanksgiving to you all!

Saturday, November 17, 2012

Homemade Pumpkin Spice Lattes and A Winner!


Just a quicky post today. This is a recipe I've shared before but I've tweaked it a bit so that it serves two, rather than one. Because a pumpkin spice latte needs to be shared. My version of this ever popular drink contains real pumpkin and spices, not flavored syrup. It's just as easy to make as it is to drive to Starbucks, but it's much less expensive and better for you! Thanks Maranda for making and reminding me of this delicious beverage. 


Pumpkin Spice Latte from Monica H

Printer Friendly Version 
  • 2 cups strong brewed coffee
  • 3/4 cup half-n-half
  • 1/4 cup pumpkin puree
  • 4 Tablespoons sugar in the raw
  • 1/2 teaspoon pumpkin pie spice
  • 1 teaspoon vanilla extract
  • whipped cream and cinnamon for garnish

Combine coffee, half-n-half, pumpkin, sugar and pumpkin pie spice in a small saucepan. Bring to a high simmer (just before boiling), whisking occasionally. Remove from heat and stir in vanilla.

Pour into two mugs and top with whipped cream and a sprinkling of cinnamon, if desired.

Makes two large servings.


And the winner of the Chinet Bakeware is commenter #40 Melody J. Congratulations! Thank you to all that entered the giveaway. And thank you Chinet for being so generous!

Tuesday, November 13, 2012

A Dip Recipe and A Chinet Bakeware Giveaway!


The month of November has slipped on by me without me noticing it. How is it possible that Thanksgiving is next week? It was 82 degrees here a couple days ago and I've been seeing Christmas stuff filling up the stores. It just doesn't feel right. I'm not ready! Surely I'm not the only one? I'd love to have a lineup of Thanksgiving sides and dessert ideas for you, but that's just not going to happen. Instead I have one delicious dip for you that you can serve to your guests while watching the ball game and enjoying a cold beer. That's better than green been casserole, any day. 


I was asked by the Wisconsin Milk Marketing Board to come up with an original idea for a dip containing dairy. I brainstormed a bit with my mom and my friend Maranda, from Jolts and Jollies and we came up with  this Cheesy Ranch BLT Dip. It's loaded with spinach, tomatoes, bacon, held together with a healthy serving of Mozzarella and cream cheese and seasoned with Ranch dressing and fresh garlic. Served atop a a sliced baguette, this was like the classic sandwich kicked up a few notches. Maranda and I came up with several ideas for dips that we wanted to make so she decided to throw herself an impromptu birthday party and asked people to bring a dip along with them. I brought two dips- this hot BLT dip and Mr. H :-) It was great fun, we laughed, made new friends and no one went home hungry- Happy birthday Manna!

Cheesy Ranch BLT Dip from Monica h

Printer Friendly Version

Serves 8
  • 6 slices bacon
  • 1 box (10 oz.) frozen chopped spinach, thawed and drained
  • 8 oz. cream cheese, at room temperature
  • 8 oz. (2 cups) Mozzarella cheese, freshly grated
  • 1/2 cup mayonnaise
  • 1/2 cup diced tomato, seeded
  • 1 clove garlic, finely minced
  • 3 Tablespoons Ranch dressing powder
Preheat oven to 400 degrees F. Lightly grease a 2 quart casserole dish with nonstick cooking spray and set aside.

Dice bacon into 1/2-inch pieces and cook over medium-high heat til crisp. Remove bacon from the grease with a slotted spoon and allow to drain on a paper towel lined plate. 

In a large bowl, combine spinach, cream cheese, 1 1/2 cups of the grated Mozzarella, cooked bacon, mayonnaise, tomato, garlic and Ranch dressing powder. Using a rubber spatula, mix until well combined. Scrape mixture into the prepared dish and smooth the top. Sprinkle the top with the remaining half cup of Mozzarella. 

Bake for 20-25 minutes or until bubbly and golden. Serve with a sliced baguette or crackers. 


Earlier this year, I did a review of Chinet Bakeware and loved it. Anytime I have a gathering to go to or if I'm taking a dish to a friend, I now bake it in these wonderful pans. You can read my review of the product HERE, if you'd like. Since the holidays are right around the corner, Chinet has graciously offered to give one of my readers a set of disposable Chinet Bakeware. One lucky reader will receive a set of each of the sizes pictured in the photo above. 

All you have to do is tell me what your favorite Thanksgiving food is by leaving me a comment on this post. Please leave a way for me to contact you if you win. I will select a winner this week. Offer valid to residents of the USA only. Good luck!

Thursday, November 1, 2012

Why I Love Fall


I used to think that Summer was my favorite season. And maybe for a while, it was. After all, my birthday is in the Summer, and there was no school, and then there were trips to the beach! Yes, Summer is pretty great. But as I got older, I began to appreciate the beauty that is Autumn. The cooler nights, the changing of the leaves, warm colors and cozy sweaters, and of course the pumpkins! Pumpkins, in all their orange glory, make me smile. They make the season for me. And baking with it marks the start of the holidays. 

Let's be real, I live in Central Texas and I have yet to break out any kind of sweater, but it's my fantasy and I can dream, right? It's still in the 80's here and while I may still be wearing t-shirts and flip flops, I am drinking pumpkin spice lattes, wishing for the crunch of brittle leaves underfoot, and visiting the pumpkin patch. We took Hayden to the pumpkin patch last year, when he was just weeks old and he wasn't too thrilled, but this year he had a great time touching and patting all the gourds around him. We made it home with three mini pumpkins, one for each of my boys, and took a few family photos while we were there. Can you tell I was excited to be there?! 


Hayden likes to roll his pumpkin around the house and every now and again I'll catch him putting it in the back of his dump truck and pushing it through the kitchen. So cute, that boy! He loved these cookies too. I gave him a few without the icing and he just devoured them. In fact, while I was taking pictures of them, he kept grabbing them. Those hands get him in trouble sometimes! On their own, they are very much like pumpkin muffins, but with the brown butter icing, they are something special. They're spicy and sweet and have a nuttiness to them thanks to the browned butter. They're also soft and cake-like, unlike most cookies which makes them the perfect accompaniment to tea or coffee. I almost placed some of the icing in between two cookies and sandwiched them together like a whoopie pie. Oh that would have been a treat!


I received a package of butter in the mail a couple weeks ago. I love when that happens! The folks from Twisted Butter sent me an array of their new jazzed up butters. The blends include premium grade AA salted butter, canola oil, honey, fresh fruits, vegetables, herbs and bacon. Yes, bacon! The Bacon, Dijon Mustard & Chive butter was one of my favorites while my mom couldn't get enough of the Blueberry, Honey & Lemon Zest. I decided to use the Cinnamon, Honey & Brown Sugar butter in these cookies to make them extra special and it was a success. Visit the Twisted Butter website for more "infused" flavors and to print a coupon to use on your next purchase. Thank you Twisted Butter for allowing me to sample your product!


Pumpkin Cookies with Brown Butter Icing


For the Cookies: 
  • 6 Tablespoons Twisted Butter Cinnamon, Honey & Brown Sugar, at room temperature (unsalted butter may be used in place of the Twisted Butter)
  • 1 cup packed light brown sugar
  • 1 large egg
  • 3/4 cup (7 oz) canned pumpkin puree
  • 6 Tablespoons evaporated milk
  • 1/2 teaspoon vanilla extract
  • 1 1/3 cups all purpose flour
  • 1/2 teaspoon baking powder
  • 1/2 teaspoon baking soda
  • 1/2 teaspoon kosher salt
  • 3/4 teaspoon ground cinnamon
  • 1/2 teaspoon ground ginger
  • 1/2 teaspoon freshly grated nutmeg
For the Icing: 
  • 2 cups powdered sugar, sifted
  • 5 Tablespoons unsalted butter
  • 3 Tablespoons evaporated milk, plus more if needed
  • 1 teaspoon vanilla extract
Preheat the oven to 375 degrees F.

For the cookies:  In a large bowl, combine the butter and brown sugar. With an electric mixer on medium speed, beat until pale and fluffy, about 3 minutes. Mix in the egg, then reduce the speed to low and add the pumpkin, milk and vanilla. Mix until well blended, about 2 minutes. 

Slowly add the flour, baking powder, baking soda, salt, cinnamon, ginger and nutmeg. Mix until combined. 

Transfer half the batter to a pastry bag fitted with a 1/2-inch plain round tip. Pipe 1 1/2-inch rounds onto parchment paper-lined baking sheets, spacing the cookies 1 inch apart. (A small ice cream scoop may be used if you don't have a pastry bag). 

Bake cookies for 12 minutes or until the tops spring back when touched, rotating the sheets halfway through the baking process. 

Cool the cookies on the sheets on the parchment for 5 minutes before transferring them to wire racks. Allow them to cool completely for icing them. 

For the icing: Put the sifted powdered sugar in a medium bowl. Melt the butter in a small saucepan over medium heat, cooking and swirling the pot occasionally until the butter turns a golden brown, about 3 minutes. Be careful not to let the butter burn. 

Immediately, add the butter to the sugar, scraping any brown bits from the sides and bottom of the pot. Add the milk and vanilla and stir until smooth. Add a teaspoon more of the evaporated milk at a time, as needed if the icing gets too stiff to spread.

Spread about 1 teaspoon of icing onto the tops of each cookie using the back of a spoon or an offset spatula. Allow icing to set before serving. 

Store cookies in single layers, in an airtight container. 

Makes about 3 dozen


NOTE: I was not compensated by Twisted Butter in any way. The opinion I express here, is mine alone. I was simply sent a sampling of product and I chose to blog about it.


Related Posts with Thumbnails